Table of Contents
ToggleInstalling a home automation system isn’t rocket science, but it does require planning, patience, and a willingness to learn your way around wireless protocols. This guide walks through what you need to know before buying your first smart device, how to set up a reliable network backbone, and the step-by-step process to get everything talking to each other. Whether you’re starting with a single smart thermostat or planning a whole-home setup, understanding the fundamentals will save you hours of troubleshooting and buyer’s remorse down the road.
Key Takeaways
- Home automation system installation requires planning, a stable network, and understanding wireless protocols—but doesn’t require professional expertise for most DIY homeowners.
- Plan your home automation setup by mapping devices, ensuring network capacity with a mesh Wi-Fi system, and prioritizing high-impact areas like entryways and bedrooms before expanding.
- Choose compatible platforms and devices early: prioritize Matter-certified devices for cross-ecosystem compatibility, and avoid mixing multiple protocols until you’re confident in your primary ecosystem.
- Essential tools include a non-contact voltage tester, screwdrivers, wire stripper, and a smartphone for pairing—plus proper safety gear like electrical gloves if working with 120V wiring.
- Install devices one at a time, test functionality before finalizing placement, and avoid common mistakes like skipping neutral wire checks, ignoring device placement, and mixing incompatible Zigbee profiles.
- Secure your smart home by using strong passwords, enabling two-factor authentication, and isolating IoT devices on a separate network to protect against compromised accounts or breaches.
What Is a Home Automation System and Why Install One?
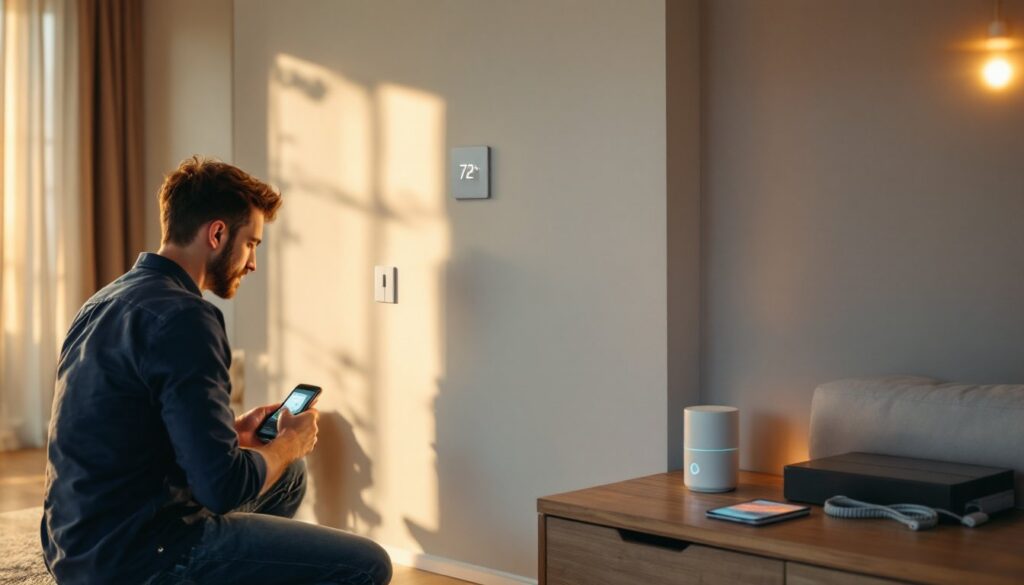
A home automation system connects devices like lights, locks, thermostats, cameras, and sensors to a central controller or network, letting you manage them remotely through an app or voice commands. At its core, it’s about convenience, automating routines like turning off lights when you leave or adjusting the thermostat before you arrive home.
But there are practical benefits beyond novelty. Energy monitoring can cut heating and cooling costs by 10–15% when thermostats learn your schedule. Security cameras and smart locks give real-time alerts and remote access. Voice-controlled lighting helps with mobility challenges. And unlike the proprietary systems of a decade ago, today’s platforms (Google Home, Amazon Alexa, Apple HomeKit, Samsung SmartThings) work with hundreds of third-party devices, making DIY home automation more accessible than ever.
Most systems operate over Wi-Fi, Zigbee, Z-Wave, or Thread, wireless protocols that don’t require running new wiring through walls. That means the average homeowner can install devices without opening up drywall or pulling permits, though hardwired installations (like smart switches replacing standard wall switches) do require basic electrical knowledge and adherence to NEC (National Electrical Code) standards.
If you’re planning to integrate motorized shades, whole-house audio, or security systems tied to monitoring services, consider consulting with professionals who specialize in custom home automation to ensure compatibility and proper installation.
Planning Your Home Automation Installation
Start by mapping out what you want to automate. Write down rooms, devices, and routines. Do you want lights that respond to motion? A thermostat that adjusts based on occupancy? Door locks you can control remotely? Prioritize high-impact areas, entryways, living rooms, and bedrooms, before tackling utility spaces.
Network capacity is the backbone of any smart home. Most devices connect via Wi-Fi, and a household with 20+ connected gadgets can overwhelm a basic router. Consider upgrading to a dual-band or tri-band mesh Wi-Fi system (with coverage of at least 2,000 square feet per node) to maintain stable connections. Devices like cameras and video doorbells consume significant bandwidth: budget 2–4 Mbps per HD camera stream.
Check your home’s existing infrastructure. If you’re installing smart switches, you’ll need a neutral wire in the switch box, standard in homes built after the 1980s but sometimes absent in older construction. If neutral wires are missing, you’ll need to use smart bulbs or hire an electrician to retrofit the boxes. That’s not a DIY project unless you’re comfortable working inside a breaker panel.
Budget realistically. A starter setup (hub, thermostat, a few smart bulbs, and a plug) runs $200–$400. Expanding to door locks, cameras, and sensors can push costs to $1,000–$2,500, depending on device quality. Prices fluctuate with sales cycles: Black Friday and Prime Day often bring 20–40% discounts on major brands.
Choosing Compatible Devices and Platforms
Platform compatibility is critical. Amazon Alexa, Google Home, and Apple HomeKit are the dominant ecosystems, but not every device works with all three. Before buying, confirm compatibility on the manufacturer’s spec sheet or the platform’s certified device list.
Zigbee and Z-Wave devices require a compatible hub (like Samsung SmartThings, Hubitat, or Amazon Echo Plus with built-in Zigbee). These protocols use mesh networking, where each device relays signals to extend range, ideal for larger homes. Z-Wave operates on a less congested frequency (908.42 MHz in the U.S.) than Wi-Fi, reducing interference.
Matter, the new unified smart home standard launched in late 2022 and gaining traction in 2026, promises cross-platform compatibility. Devices certified with the Matter logo work across Alexa, Google, Apple, and Samsung ecosystems without separate hubs. If you’re starting fresh, prioritizing Matter-certified devices reduces future headaches.
Avoid mixing too many protocols early on. Stick with one primary ecosystem and expand from there. If you choose Google Home, for example, prioritize Wi-Fi and Matter devices before adding Zigbee peripherals.
Essential Tools and Equipment You’ll Need
Most smart home installations don’t require a full workshop, but having the right tools makes the process smoother and safer.
Basic toolkit:
- Screwdrivers (Phillips and flathead) for mounting devices and opening switch plates
- Wire stripper/cutter if you’re installing smart switches or hardwired devices
- Non-contact voltage tester, essential for confirming power is off before touching any wiring
- Drill and bits (if mounting cameras, sensors, or hubs to walls)
- Stud finder to locate solid anchor points for heavier devices
- Smartphone or tablet for pairing devices and running setup apps
- Ladder or step stool for ceiling fixtures and high-mounted sensors
Optional but helpful:
- Label maker to mark breakers and cables during electrical work
- Fish tape if running ethernet cables through walls (for hardwired hubs or PoE cameras)
- Multimeter for diagnosing wiring issues
Safety gear (non-negotiable):
- Safety glasses when drilling or working overhead
- Electrical gloves (rated for 1000V) if working inside breaker panels
- Dust mask if drilling into plaster or drywall in older homes (potential lead paint or asbestos)
If your project involves replacing wall switches or installing hardwired smart thermostats, you’ll be working with 120V AC wiring. Always turn off the breaker, test with a voltage tester, and if you’re uncomfortable with electrical work, hire a licensed electrician. Many jurisdictions require permits for modifications to home electrical systems, even if it’s just swapping a switch. Check with your local building department.
Step-by-Step Installation Process
Every device has its own setup quirks, but the general workflow is consistent. Follow these steps for a smooth installation.
-
Unbox and inventory. Confirm all parts are included, hubs, power adapters, mounting hardware, and any required cables. Read the quick-start guide cover to cover before plugging anything in.
-
Charge or power devices. Battery-powered sensors and cameras often ship partially charged. Top them off before mounting to avoid climbing a ladder twice.
-
Download the manufacturer’s app. Each device requires its own app (at least initially) for setup. Create accounts and enable notifications. Some apps require location permissions to automate based on your arrival or departure.
-
Install mounting hardware first. If you’re mounting cameras or sensors, drill pilot holes and insert anchors before attaching the device. Use a level to keep things straight, crooked cameras look sloppy and can limit their field of view.
-
Pair devices one at a time. Don’t try to add five smart bulbs simultaneously. Pair them individually to avoid confusion and ensure each connects properly. Most devices enter pairing mode when powered on for the first time or after a factory reset (usually a long press on a button).
-
Test before finalizing. Before sealing up a wall plate or mounting a camera permanently, test functionality. Trigger motion sensors, toggle switches, and check camera angles. It’s easier to adjust now than after everything’s buttoned up.
-
Name devices clearly. Use room-specific names (“Kitchen Overhead” instead of “Light 3”). When you’re troubleshooting at 11 p.m., you’ll appreciate the clarity.
-
Create routines and automations. Once devices are paired, set up automatic home control routines: “Goodnight” to lock doors and turn off lights, “Good Morning” to adjust the thermostat and start the coffee maker.
Setting Up Your Smart Hub and Network
If you’re using a hub (SmartThings, Hubitat, or a voice assistant with built-in hub capabilities), start here before adding peripherals.
-
Position the hub centrally. Place it near your router for a strong network connection and within range of devices. Avoid metal cabinets or thick walls that block wireless signals.
-
Connect to power and network. Most hubs use wired Ethernet for stability, though some offer Wi-Fi as a backup. A wired connection is always preferable for devices managing dozens of endpoints.
-
Update firmware immediately. Hubs often ship with outdated software. Run all updates before pairing devices to avoid compatibility issues.
-
Configure network settings. Enable 2.4 GHz Wi-Fi for smart devices. Most don’t support 5 GHz, and attempting to connect them to the wrong band is a common frustration. If your router broadcasts a single SSID for both bands, temporarily disable 5 GHz or create a separate 2.4 GHz network.
-
Set up guest network isolation (optional but smart). Placing IoT devices on a separate VLAN or guest network limits security risks if a device is compromised. Routers with this feature let you isolate smart devices from computers and phones.
For larger installations spanning whole home automation, consider a dedicated network switch and access points to handle traffic. Homes with 50+ devices benefit from managed network equipment, which may require consulting with professional installers.
Common Installation Mistakes to Avoid
Even experienced DIYers hit snags with smart home setups. Here’s what trips people up most often.
Skipping the neutral wire check. Smart switches need a neutral wire to power their radios. If your switch box only has a hot, load, and ground, you can’t install most smart switches without rewiring. Check before buying.
Overloading a single circuit. Adding a dozen plug-in smart devices to one outlet via power strips can trip breakers. Distribute devices across multiple circuits, especially high-draw items like space heaters on smart plugs.
Ignoring device placement. Motion sensors pointed at heating vents or windows can false-trigger from temperature changes or sunlight. Door/window sensors need a ½-inch gap or less between the sensor and magnet to function reliably.
Forgetting to label breakers. If you’re installing smart switches, you’ll be flipping breakers. If your panel isn’t labeled, you’ll waste an hour finding the right one. Take 30 minutes now to map and label every circuit.
Mixing incompatible Zigbee profiles. Not all Zigbee devices work with all Zigbee hubs. Zigbee 3.0 is the unified standard, but older devices (Zigbee HA 1.2, Zigbee LL) may not pair. Verify compatibility before purchasing.
Underestimating range. Wi-Fi smart plugs work fine 15 feet from a router but fail at 50 feet through two walls. Test range before permanently mounting devices, and use mesh nodes or Zigbee repeaters (any powered Zigbee device acts as a repeater) to extend coverage.
Skipping factory resets. If you’re installing used devices or troubleshooting a stubborn pairing issue, factory reset the device. Lingering configurations from previous owners or setups cause 90% of “won’t connect” problems.
Not securing accounts. Smart home apps control locks and cameras. Use strong, unique passwords and enable two-factor authentication. A compromised account is a compromised home.
Finally, don’t rush. A single device installed correctly beats ten half-finished setups. Take your time, double-check wiring (with power off), and when in doubt, consult guides from trusted smart home resources or call in a pro. Safety and functionality always trump speed.
Once everything’s up and running, you’ll have a home that responds to your routines, saves energy, and gives you remote control from anywhere. And when friends ask how hard it was, you can honestly say: not as hard as it looks, if you plan ahead.